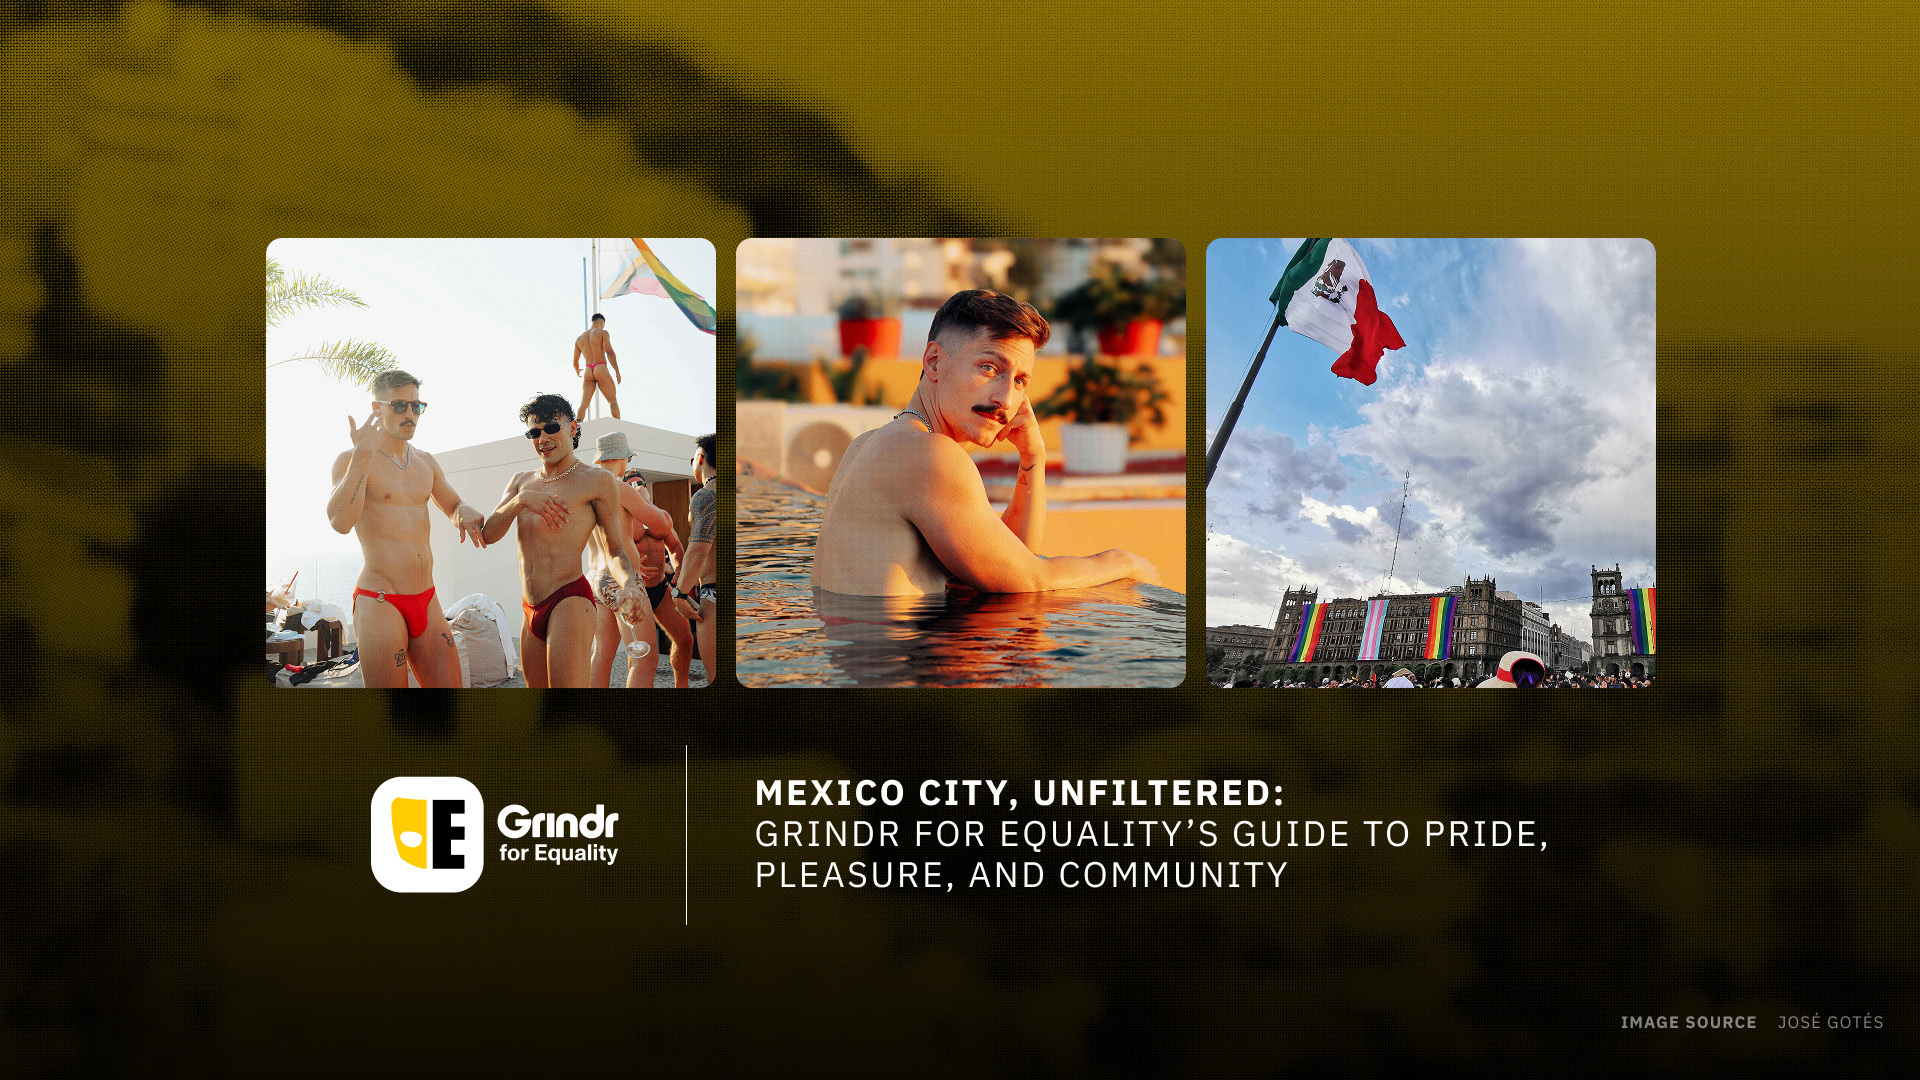
This summer, Mexico is hosting the world. Pride is taking over the streets. The bars are packed, the stadiums are full, and somewhere right now, someone is falling in love over tacos al pastor at 2 a.m.
Mexico City doesn’t do anything half-heartedly.
Beyond the typical tourist hotspots, explore where generations of LGBTQ+ people have connected, flirted, built friendships, and created community in one of the world’s most vibrant queer capitals in this two-part blog series. For this part travel guide and part community resource, we asked some of Grindr for Equality’s partners in Mexico – Trevor Project Mexico, Inspira Cambio, Clinicas Especializadas Condesa, and MOVii – to share their version of the city—from favorite places to eat, explore, dance, and recharge to trusted resources for sexual health, gender-affirming care, and emotional support. Because every adventure is better when you know where to turn if you need help.
Find Queer Community 🌈
Whether you're traveling solo or looking to meet locals, Trevor Project Mexico points us toward the community spaces that have helped generations of LGBTQ+ people find belonging.
Part community center, part cultural space, part mutual aid hub. Alex Lara, a counselor at The Trevor Project, recommends checking "their cultural events calendar, where you can find live music, poetry readings, ballroom events, or themed exhibitions in their art gallery—all within a safe and affirming space."
Address: Pedro Moreno 113, Guerrero
A rooftop bar and queer art gallery open from mornings to nights. Lara recommends visiting for "an atmosphere that celebrates all identities, and a terrace serving the perfect drinks to ease into the evening.”
Address: Puebla 94, Col. Roma Nte., Alc. Cuauhtémoc
The largest LGBTQ+ bookstore in Latin America, Somos Voces combines queer literature, a café, and a cultural forum that regularly hosts community gatherings.
Address: Niza 23, Juárez, Cuauhtémoc
Get Cultured 🎨
For Inspira Cambio AC, culture is more than entertainment—it's a tool for community, self-expression, and collective wellbeing. Their recommendations highlight the museums and artistic spaces where people come together through art, performance, and culture.
This museum preserves the history, memory, and resistance of Mexico’s trans communities through photography, archives, artwork, and personal belongings from the twentieth century.
Address: Dr. Andrade 24, Doctores, Cuauhtémoc
University Museum of El Chopo
Known locally as the “Crystal Palace,” El Chopo has long been housed counterculture, queer creativity, and underground art that celebrates non-normative identities.
Address: Dr. Enrique González Martínez 10, Santa María la Ribera
On the last Wednesday of every month, museums across the city stay open late with concerts, performances, guided tours, and special events.
Location: Centro Histórico, Roma, and Juárez
Sonideros at Alameda Central
From Thursday through Sunday, Alameda Central transforms into a massive dance floor—collectives set up sound systems playing classic cumbia and salsa, a tradition recently recognized as Intangible Cultural Heritage of CDMX. No experience necessary!
Location: Bellas Artes Plaza and Alameda Kiosk
💡 Build trust with people online and offline with our “Taken on Grindr” feature, verifying your identity on your profile and in your chats.
Stay Active 💪
Clínicas Especializadas Condesa reminds us that some of Mexico City's most important LGBTQ+ gathering spaces aren't clubs or bars at all. The exercise bars along Insurgentes to the trails of Chapultepec are where generations of queer people have exercised, flirted, and found community in their daily lives.
The green heart of Mexico City. Wander the park, rent a boat on the lake, visit museums, or people-watch beneath the trees—and don't miss Casa del Lago, one of the park's most iconic cultural spaces.
Outdoor calisthenics equipment, shirtless regulars, and plenty of people-watching make this one of the city's most unexpectedly social gathering spots. In a homoerotic short story that Clínica Especializada Condesa wrote as part of their broader campaign, these workout bars are a destination in and of themselves:
After picking up my PrEP at Clínica Condesa—located just three Metro stops from the Insurgentes workout bars—I walked toward the shaded benches. The workout bars are part of the architecture and culture of Mexico City. For people who prefer exercising outdoors instead of in a gym, they create a landscape of brightly painted metal structures, sun-kissed skin, and bare torsos. Best of all, they’re completely free.
I met Chema there one October afternoon, a toned man with dark skin and a smile—and abs—that were hypnotic at first sight. Judging by the sweat on his body, he had already spent more than an hour exercising beneath the midday sun.
He told me he had been working out in that park for two years. He preferred calisthenics, being outdoors, and feeling like his body was part of the urban landscape. He loved showing off—displaying his physique in public. He knew people like me enjoyed taking a look.
Learn more about Clínicas Especializadas Condesa’s campaigns on their social media here.
In the Dark: Gay Bathhouses ♨️
For many LGBTQ+ people, bathhouses and saunas remain places of connection, exploration, and community—and a reminder that sexual health and pleasure can go hand in hand.
💡 Whether you’re exploring nightlife, bathhouses, or hookups, remember that PrEP, PEP, HIV testing, and sexual health services are available through Clínicas Especializadas Condesa.
One of Mexico City’s best-known gay bathhouses, spread across multiple levels, SODOME combines the atmosphere of a social club with the amenities of a modern sauna.
Address: Calz. Gral. Mariano Escobedo 716-A, Anzures
Less polished and more local than some of the city’s newer venues, it has earned a loyal following for its old-school atmosphere, steam rooms, sauna facilities, massages, and distinctly Mexico City character.
Address: Manuel María Contreras 11, San Rafael
After Dark: Gay Bars 🍹
All three partners’ recommendations for queer nightlife stretched across two of the city's most iconic nightlife districts: Zona Rosa and República de Cuba. Together, they form the beating heart of queer nightlife in CDMX—and the perfect starting point for a night that may not end where you planned.
💡 Meeting someone new? Grindr’s Hide Profile, Incognito Mode, and In-App Video Chat can help you connect on your own terms.
One of the most unique nights out. Think cumbia, norteño music, social dancing, cowboys, bears, and plenty of opportunities to meet people. Tuesdays and Thursdays feature popular cumbia lessons.
Recommended by: Trevor Project MX
Address: Florencia 35-B, Juárez (Zona Rosa)
A cruising bar with a retro aesthetic that evokes a classic era of gay nightlife in CDMX.
Recommended by: Clínicas Especializadas Condesa
Address: Florencia 37-B, Juárez (Zona Rosa)
Part cantina, part cultural experience. Expect mariachi, live folk music, and a lively atmosphere that captures the spirit of Mexico City’s historic center.
Recommended by: Inspira Cambio
Address: Eje Central Lázaro Cárdenas 10, Centro Histórico / República de Cuba
Travelling outside of CDMX? Check out Part 2 for recommendations in Monterrey and Puerto Vallarta, as well as more information on our key partners.
This Pride Month, Grindr is heading to Mexico to celebrate alongside the country's LGBTQ+ community. To mark the occasion, we're sharing a special edition of our blog dedicated to Mexico and beyond. Part travel guide and part community resource, this edition—developed alongside our partners from Grindr For Equality—brings together in-app safety tips, local recommendations, and organizations that support LGBTQ+ people across the country. From places to relax and recharge to spaces where you can connect, dance, explore, and celebrate, it's designed to help you experience more of what Mexico offers.

.webp)
.webp)
.webp)


